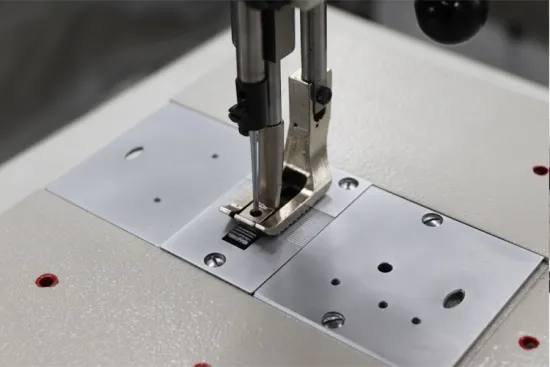
changing a needle on a sewing machine
How to Change a Needle on a Sewing Machine
Changing a needle on a sewing machine may seem like a daunting task for beginners, but it is a simple and essential skill that can greatly enhance your sewing experience. A fresh needle can make a world of difference in the quality of your stitches, preventing issues such as skipped stitches, fabric snags, and uneven seams. This guide provides step-by-step instructions to help you confidently change a needle on your sewing machine.
Why Change Your Needle?
Sewing machine needles can wear out over time, becoming dull or bent with use. It's advisable to change your needle after every 6-8 hours of sewing. If you notice any of the following signs, it’s time for a change
1. Skipped stitches. 2. Unusual noise from the machine. 3. Fabric snagging or pulling. 4. Uneven stitch length.
By regularly changing your needle, you can maintain your sewing machine’s performance and ensure high-quality results in your projects.
What You Will Need
Before getting started, gather the necessary materials
. You will need- A compatible replacement needle for your sewing machine (ensure you know the correct type and size). - Your sewing machine. - A flat workspace well-lit for visibility. - A screwdriver or a needle-seizing tool (if applicable, depending on your machine).
changing a needle on a sewing machine

Step-by-Step Instructions
1. Turn Off Your Machine Safety should always be your first priority. Before you begin, turn off your sewing machine to prevent any accidental starts.
2. Remove the Old Needle - Locate the needle clamp on your sewing machine. This is usually found just above the presser foot. - Using your screwdriver, loosen the needle clamp by turning it counterclockwise. Some machines may have a needle release button instead. - Once the clamp is loose enough, gently pull the old needle straight down and out of the holder. Be careful, as the needle can be sharp.
3. Choose the Right Replacement Needle - Ensure you have the right type of needle for your fabric and sewing project. Needles come in various sizes and types, such as universal, ballpoint, and quilting needles. - For standard sewing, a universal needle (size 80/12) is a great choice. If you're working with heavier fabrics, consider a larger size.
4. Insert the New Needle - Take your new needle and ensure its flat side is facing the back of the machine. This aligns with the needle holder's positioning. - Slowly insert the needle into the holder, pushing it up as far as it will go. - Tighten the needle clamp by turning it clockwise until the needle is securely held in place. It’s crucial to ensure that the needle is firmly inserted to prevent it from falling out during sewing.
5. Test the Needle - After changing the needle, it’s good practice to turn on the machine and run a test stitch on a scrap piece of fabric similar to your project fabric. - Check the stitching to ensure everything is functioning correctly. Look for uniformity and listen for any unusual sounds.
Conclusion
Changing a needle on your sewing machine is a straightforward process that can significantly affect your sewing projects’ outcome. By following these steps, you can ensure that you’re always sewing with a fresh, sharp needle, reducing the likelihood of complications while enhancing the overall quality of your work. So next time you sit down at your machine, remember the importance of a good needle – it’s one of the simplest ways to keep your sewing experience enjoyable and productive. Happy sewing!
-
Industrial Cylinder Arm Sewing Machine: Revolutionizing Heavy-Duty SewingNewsJul.28,2025
-
Cylinder Arm Sewing Machine: Perfect for Special Sewing ApplicationsNewsJul.28,2025
-
Cylinder Bed Sewing Machine: Essential for Sewing Complex MaterialsNewsJul.28,2025
-
Heavy Duty Sewing Machine: The Essential Tool for Industrial ApplicationsNewsJul.28,2025
-
Computerized Pattern Sewing Machine: Revolutionizing Precision StitchingNewsJul.28,2025
-
Heavy Duty Industrial Sewing Machine: Power Meets PrecisionNewsJul.28,2025
-
Leather Sewing Machine: The Industrial Standard for Tough MaterialsNewsJul.18,2025


